
Introduction
Before you can use a Raspberry Pi, you need to install an operating system (OS). The OS allows the Raspberry Pi to boot, run programs, and communicate with its hardware. Fortunately, installing Raspberry Pi OS on a microSD card is simple and only takes a few minutes. This guide will walk you through the process step by step.
Want to Learn More About the Raspberry Pi Board?
What You’ll Need
Before you begin, gather the following:
- Raspberry Pi board
- microSD card (32 GB or larger, Class 10 recommended)
- microSD card reader
- Computer with internet access
- Official Raspberry Pi power supply
A high-quality microSD card helps improve performance and reduce boot issues.
💡 Not sure which board fits your project? Before diving into the installation, explore our ultimate comparison guide to the different Raspberry Pi models explained to find the perfect match for your needs.
Step 1: Download Raspberry Pi Imager
Download and install Raspberry Pi Imager, the official tool used to install Raspberry Pi OS. It is available for Windows, macOS, and Linux and makes the installation process quick and easy.
Download the Raspberry Pi Imager – : https://www.raspberrypi.com/software/
Step 2: Insert the microSD Card
Insert your microSD card into your computer using a card reader. Make sure there is no important data on the card because it will be erased during installation.
Step 3: Choose Your Raspberry Pi and Operating System
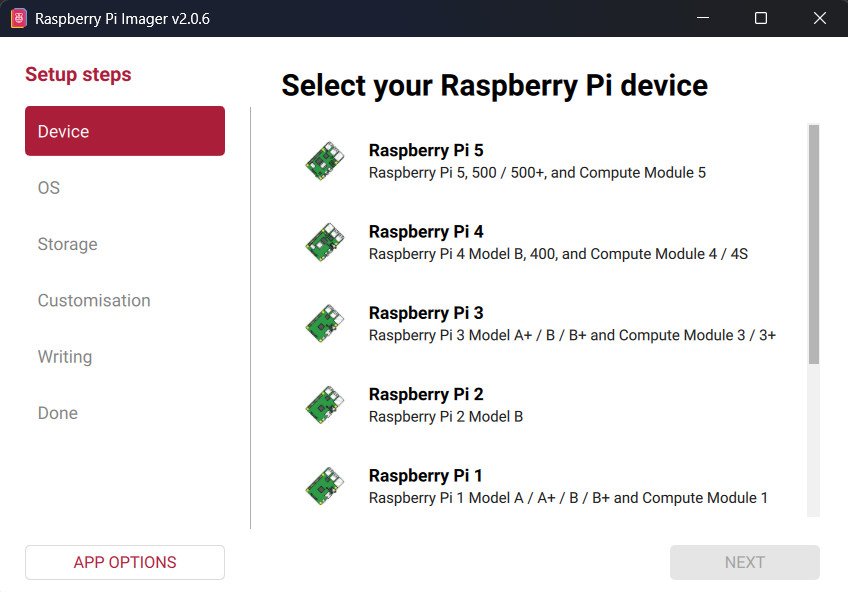
Open Raspberry Pi Imager and click Choose Device to select your Raspberry Pi model. Then click Choose OS and select Raspberry Pi OS (64-bit), which is the best option for most beginners.
Step 4: Select the microSD Card
Click Choose Storage and select your microSD card. Double-check that you have selected the correct drive to avoid deleting data from another storage device.
Step 5: Configure Advanced Settings (Optional)
Before writing the OS, you can configure:
- Username and password
- Wi-Fi connection
- Hostname
- Enable SSH
- Time zone and keyboard layout
Configuring these settings now saves time after the first boot.
Step 6: Write Raspberry Pi OS
Click Write to begin downloading and installing Raspberry Pi OS on the microSD card. The process usually takes a few minutes. Wait until the verification is complete before removing the card.
Step 7: Boot Your Raspberry Pi
Safely remove the microSD card and insert it into your Raspberry Pi. Connect a monitor, keyboard, mouse, and power supply. The Raspberry Pi will boot into the setup wizard, where you can complete the initial configuration.
Common Problems
If your Raspberry Pi does not boot:
- Check that the OS was written successfully.
- Make sure the microSD card is fully inserted.
- Use a reliable power supply.
- Try another high-quality microSD card if needed.
Conclusion
Installing Raspberry Pi OS on a microSD card is the first step toward building exciting projects with Raspberry Pi. By using Raspberry Pi Imager and following these simple steps, you can have your board ready for programming, robotics, IoT, and electronics projects in just a few minutes.